

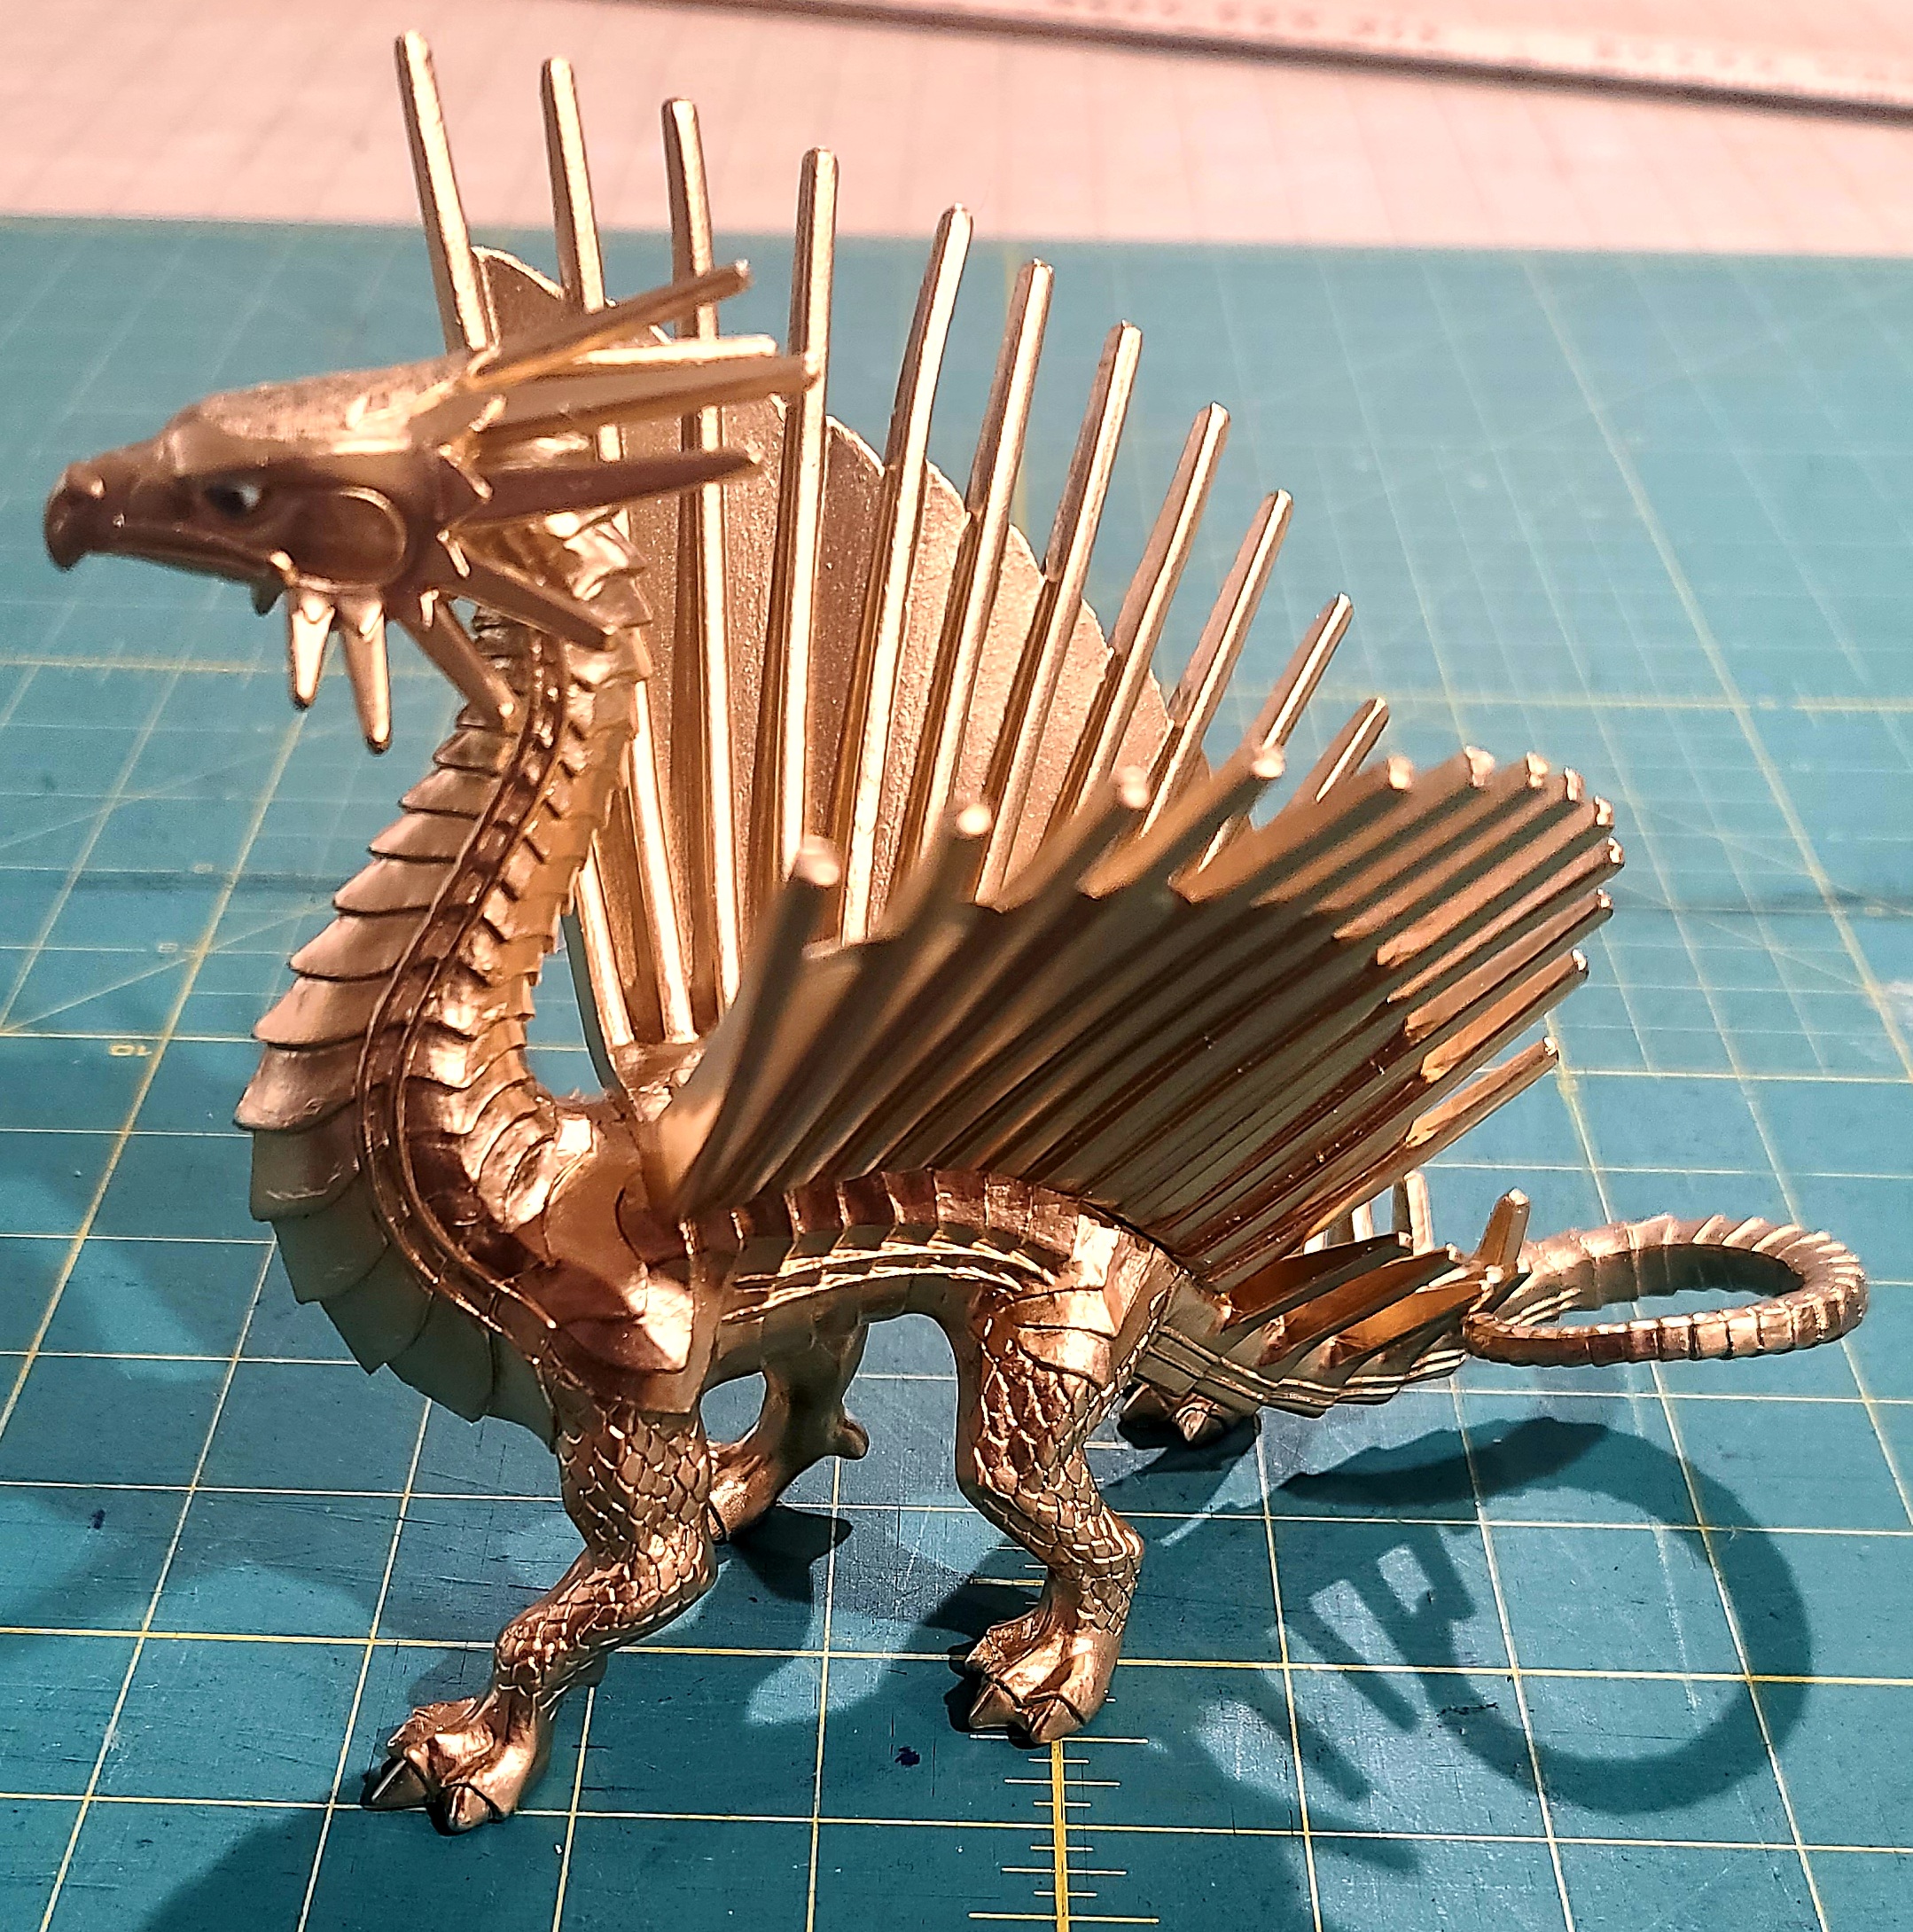
DIY Store's Halloween Skeletal Dragon Conversion |

As you can see, it has some screw holes which needed to be covered up. I first snugged the screws in place, then I applied White E6000 Glue, letting that fully cure.
The next step was to apply The Dip Technique (Minwax Polyshades Urethane Stain, Royal Walnut color), to make it look ancient, weathered, and worn.

Next, I decided it needed it needed some leather on the wings, or it could not possibly fly! To achieve this, I glued some heavy white paper (almost construction paper in weight) to the top of the wings, using E6000 Glue.

Once that dried, I cut the paper as closely to the plastic "bones" as possible. I brushed on more of the The Dip Technique. I eventually added more wing covering, but I made sure to leave it less than perfect, to reflect that this Draco-Lich has been around a long while, and it is worse for the centuries of wear!
I wanted to create ridges atop the wing coverings, to mimic the underlying bones they attached to. To accomplish this, I applied more E6000 Glue, letting it dry into raised ridges; I traced along the tops of where the bones were, and it turned out pretty good!

I added another application of The Dip Technique, and it was finished. Battle damage was added to the leathery wings, to give more of an aged appearance.

I mounted it on an MDF base, using Hot Glue. I painted on some Wood Glue, in mottled patterns, dipping it into colored sand mixtures, to create an interesting base terrain for it.

Not bad for a Halloween decoration! Cheers!
Safari Ltd. "Brass" Dragon Toy Conversion
I found the Safari Ltd. Freedom Dragon, which is close enough to the 2e AD&D Brass Dragon, in design. I set about converting it, first by applying painter's tape over its nicely detailed, and painted, eyes. Then I sprayed it with the shiniest brass spray paint I could find.

I painted the whole of the toy model with this.
It's brassy, Baby!
I then painted the belly scales and neck and tail, with a tan brown craft paint color. I painted the talons black, and I applied The Dip Technique, to finish it. I also mounted it on an MDF square base, similar to what I used for the Draco-Lich. I am disappointed in how much the matte Clear Coat dulled the Brass, but I am happy with the results, overall.


The 1e Monster Manual's Brass Dragon image.

The 2e Monstrous Manual's Brass Dragon image.

Here is a shot of the two conversions, facing off. Who would win?...
Swamp Dragon Conversion to a Copper Dragon
Here are some photo's of my Dragon conversion. I purchased this dragon toy figure from my local Michael's Hobby Store, but it can be ordered from Amazon.com, here (see this link for an image of how it originally appeared): http://www.amazon.com/Safari-10116-Ltd-Swamp-Dragon/dp/B006HEIIUM/ref=sr_1_1?s=toys-and-games&ie=UTF8&qid=1348523172&sr=1-1&keywords=swamp+dragon
I simply applied four coats of craft paint, Metallic Copper, without priming... Priming with Gesso would have saved me around two coatings -- start with white Gesso, then apply the paint you wish to cover the toy's factory green and red colors with, and you will be much happier.
 |
| Here you can see some of the factory coloring showing on the legs. |
 |
| Another view showing the factory green on the legs. |
 |
| The green might suit some folks, but for me, it was rather ugly. The copper, however, is sharp. The sculpting of the dragon figure is a decent representation of Gygax's image of the Copper Dragon, as depicted within the original Monster Manual, circa 1978, which is why I painted it Copper, of course.. |
 |
| Also on my painting table, was a Stone Giant figure in the process of being painted, along with a Caesar's Miniatures fantasy set creature, 1/72 scale set. I painted that model as an AD&D Troll. I thought it would make an interesting vignette to show the two creatures 'attacking' the Dragon. |
 |
| Here is a shot of the Dragon with his belly, and his horns, primed with white Gesso. I plan on painting his stubby wings with Copper paint + Pearlescent Medium, to set them off from the copper body mass. The large back spines will receive the same Pearlescent treatment. Not sure about the color for the horns, but I plan to paint his underbelly a darker Brown + Pearlescent Medium, to offer some contrast. I briefly considered using Brown Metallic Paint for his belly, but it just didn't seem quite right. On the bottom left, are Caesar's plastic, 1/72 scale, Goblin figures. They are rather small, but suitable for representing 4-foot tall Goblins next to a 25mm-28mm Human. |
The last photo shows the belly, and the horns, primed with white Gesso. I will also prime the toenails, and elbow spikes, then I will paint them with... Something -- haven't decided what color yet.
Some notes on painting this dragon figure with Metallic Copper craft paint: it will rub off with too much handling; seal it with a clear coat, such as painting with full-strength Future Floor Polish, then apply a wash of your desired color. As this Dragon is supposed to be Copper in color, I plan to leave it glossy on most parts of its 'skin', but the belly, and the claws will get a matte clear coat. Also, I painted the factory 'gold' eyes, with black -- this, too, will be glossy. I painted the underside a light tan color, which mates well with the copper.


 |
| The re-painted Safari Ltd. "Swamp Dragon" re-purposed as an AD&D Copper Dragon, with a 28mm Dwarf figure standing in front of his right front paw. |
 |
| This is the Safari Ltd. "Swamp Dragon", in its original condition, out of the box. |
I applied The Dip (MinWax Polyurethane Stain, Red Walnut) to the figure, to seal the paint, as well as to 'shade' it, creating darkness in the recesses. This figure turned out far better than I expected! I am a "good enough to game with" painter. I go for a decent appearance at arm's length, only. I want to game with painted figures, so I sacrifice painting quality, for speed, and actual gaming (I can paint at a higher quality, but if I went for that, I would never get much on the table, as I barely paint now!). I did not apply The Dip to the pearlized wings, and comb, along its back. I wanted these to stand out a bit, from the body. The effect is subtle, but it is there. I painted the mouth red, inside, as the green looked too out of place, and unsettling. The red just fits, so that is what he gets. If I were to paint this model again, I would not touch his horns -- I primed them with white Gesso, then I ended up painting them the same shade of brown they were from the factory...
Yellow-Gold Dragon converted to a Brass/Bronze Dragon
Here are some photo's of a toy dragon, picked up from my local Michael's Craft Store. I painted it with a new product, Liquid Leaf paint, Antique Gold color. This paint contains copper, and the label warns that it will tarnish, over time, if you do not seal it with a clear coat, so if you want some tarnish to appear on your item, just leave it alone, after painting, and wait for it to tarnish, and turn green, then seal with a few light coats, of a clear sealant.
I painted the Liquid Leaf paint only on those yellow-gold parts, which I wanted to change to the brass/bronze color. Then, when this had dried, I painted the figure with Minwax Polyshades Tudor (black) urethane stain, commonly known as The Dip. Here are a couple of photo's of the figure, unfinished, and finished, with still-wet urethane-stain.
 |
| You can see the yellow-gold factory color on the left-hand, and the raw Liquid Leaf Antique Gold on the right-hand. |
 |
| Here is the finished figure, with the urethane-stain still wet. The Dip clearly brings out the finer details of the sculpted toy figure, making it pop. |
I like the green swamp dragon
ReplyDelete